User & Group Management
The Management section in PixelView provides administrative controls for managing team members, organizing access groups, and configuring granular, module-level permissions.
User Management
The Users view (/users) provides administrators with an overview of all registered accounts, enabling them to invite team members, adjust roles, toggle account statuses, and configure module-level access control permissions.
Overview & Users Table
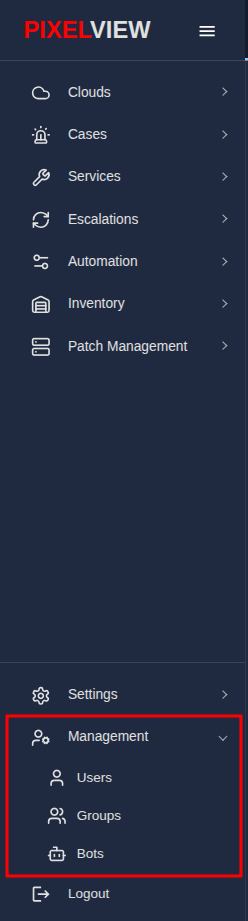
Navigate to Management > Users from the left navigation sidebar:
The users table displays all registered accounts:
| Column | Description |
|---|---|
| Name | Full display name of the user. |
| Registered email address used for login and alert notifications. | |
| Status | Current account state: * Enabled (Green badge) — Active account permitted to log in. * Disabled (Grey badge) — Account is deactivated; login access is immediately revoked. |
| Role | System role assigned to the user (Admin or User). |
| Actions | Context menu (...) to edit or manage user profile settings. |
Table Toolbar Controls:
- Search / Global Filter: Search across user names, email addresses, and roles.
- Toggle Column Filters: Apply column-specific filters.
- Show/Hide Columns: Customize which columns are visible in the table.
- Density Toggle: Switch between compact and spacious row layouts.
- Refresh: Fetch the latest user records from the server.
- Add User (
+): Open the user invitation modal dialog.
Inviting a New User
To onboard a new team member to PixelView:
- Click the
+(Add User) icon located in the upper-right corner of the table toolbar: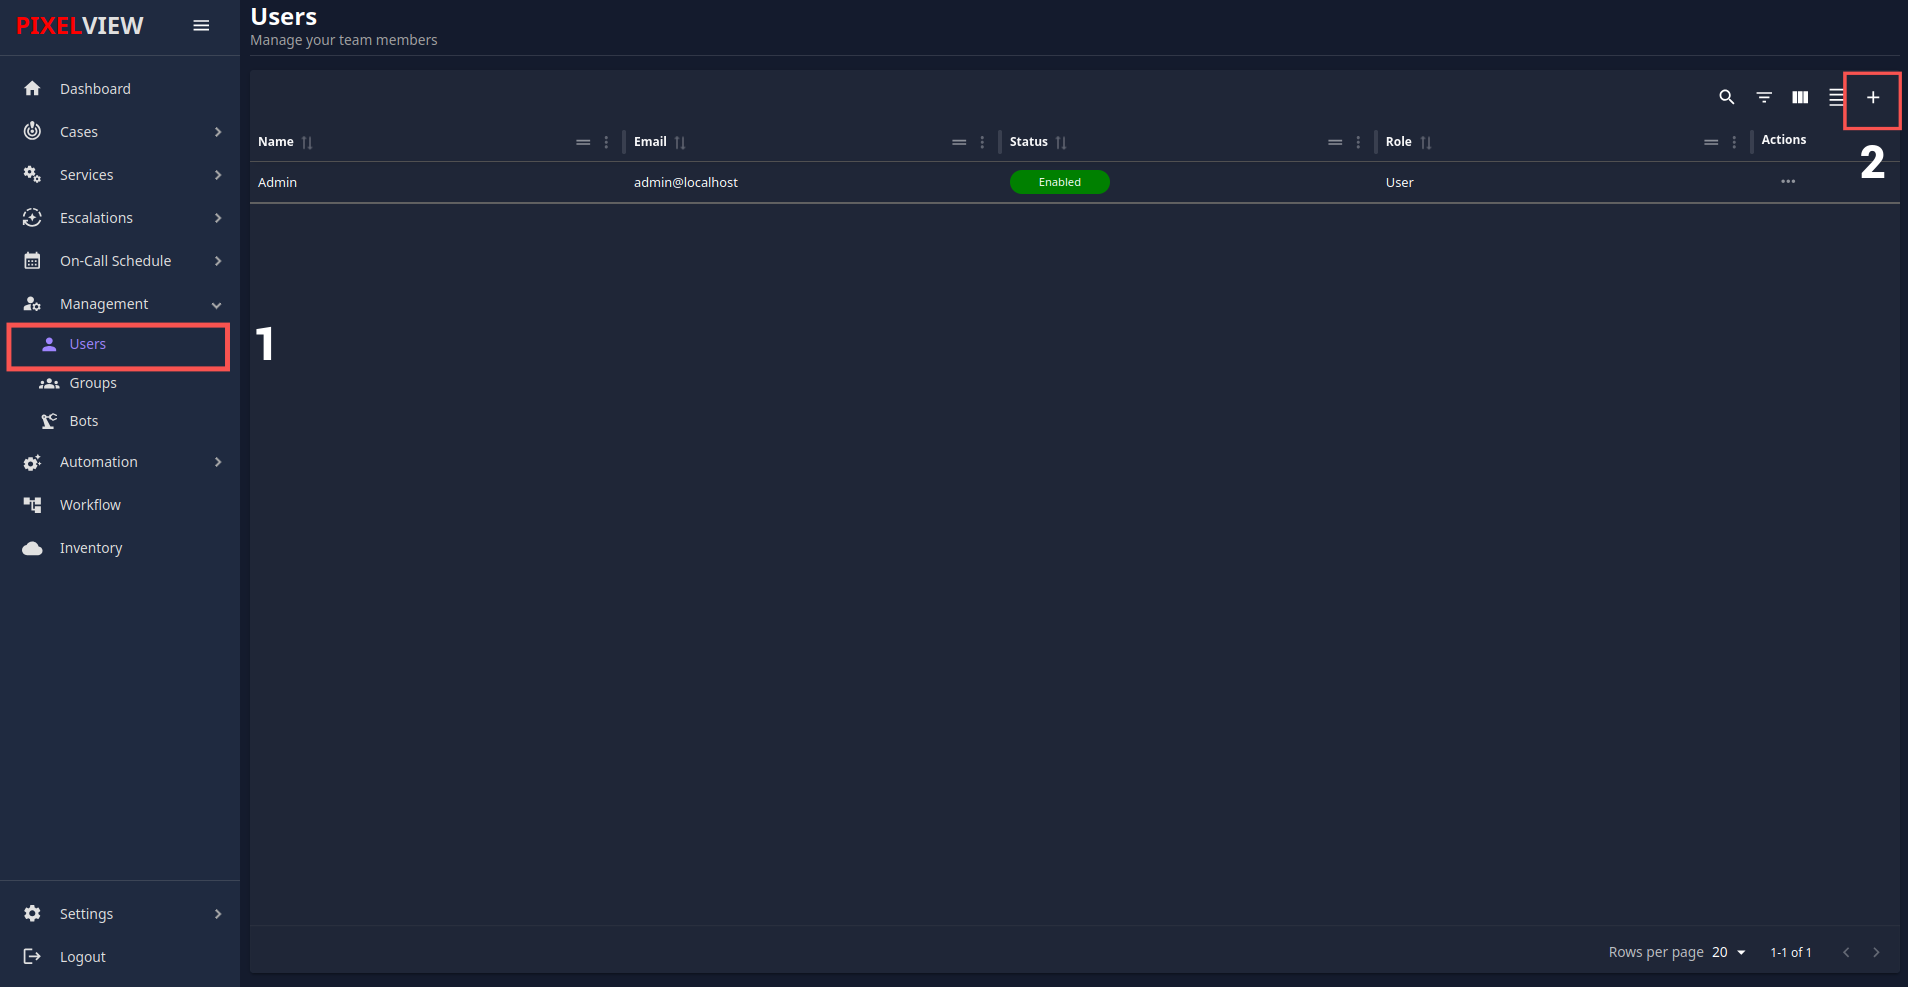
- In the Invite User modal dialog, complete the required fields:
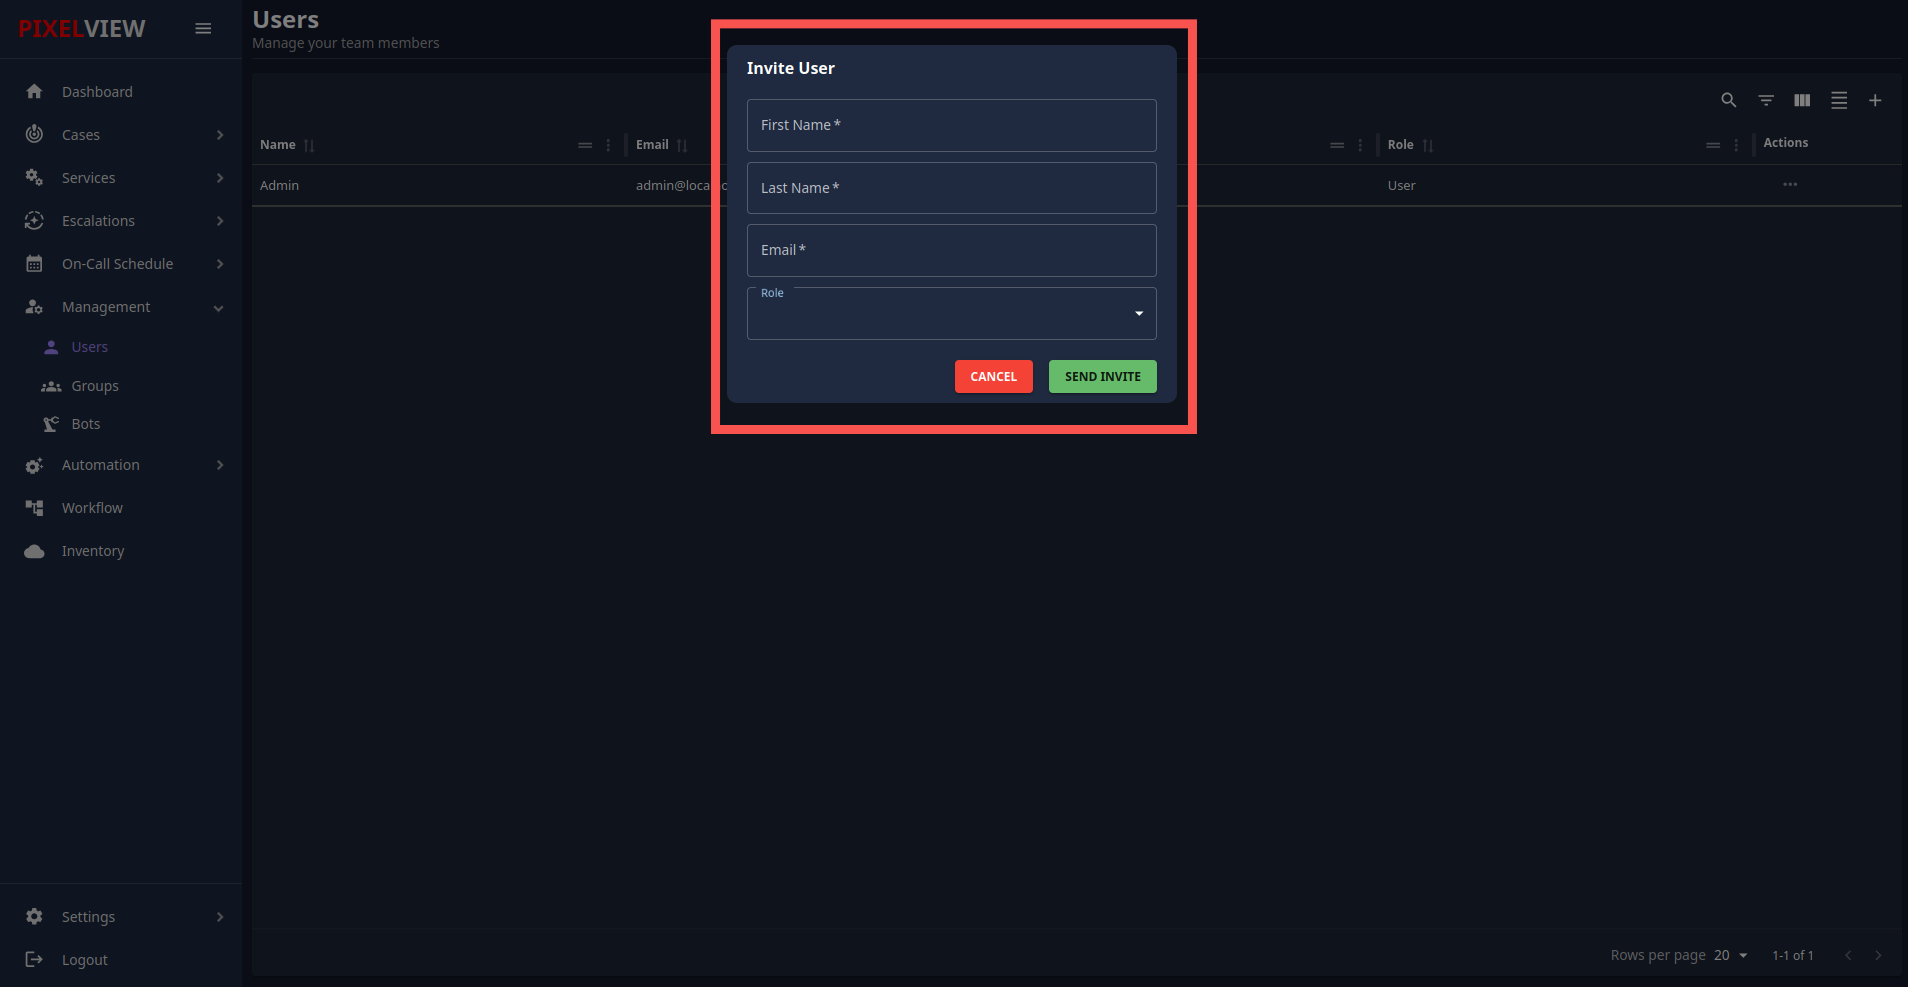
- First Name (Required): The user's first name.
- Last Name (Required): The user's last name.
- Email (Required): A valid email address to receive account credentials.
- Role (Required): Select the system role from the dropdown:
Admin: Full administrative access across the platform, including managing other users, communication gateways, and licenses.User: Standard user with access scoped by the permissions matrix.
- Permissions: Expand the permissions section to define module-level access (see Granular Permissions Matrix).
- Click Send Invite.
Initial User Password
Upon sending the invitation, an initial password is generated following the convention:
FirstName#123 (e.g., if First Name is "Duke", the default password is Duke#123).
Users should change their password upon their first login under Settings > Profile > Change Password.
Updating an Existing User
Administrators can modify account details, toggle access status, and update permission levels at any time:
- In the Users table, click the
...icon in the Actions column for the target user. - Select Edit to open the Update User modal:
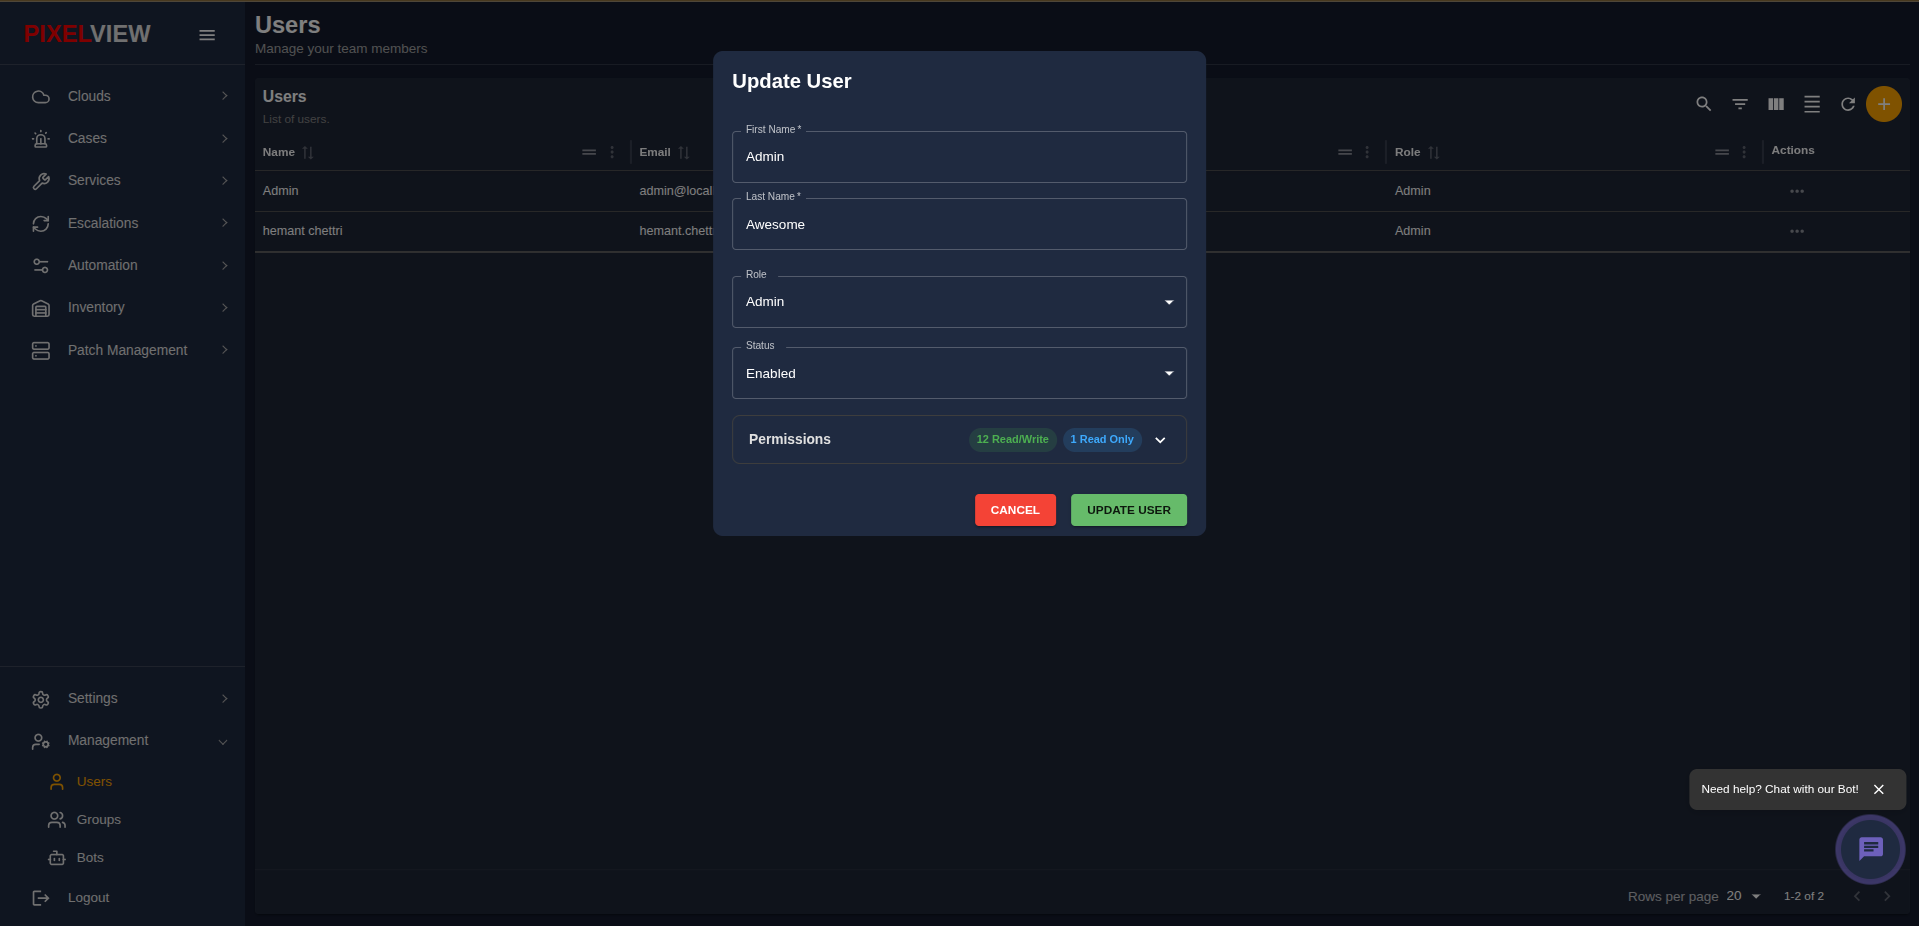
- Modify the desired parameters:
- First Name / Last Name: Update the user's name.
- Role: Switch between
AdminandUser. - Status: Toggle between
EnabledandDisabledto instantly grant or suspend access. - Permissions: Adjust individual read/write capabilities across platform modules.
- Click Update User to save the changes.
Granular Permissions Matrix
PixelView features a role-based access control (RBAC) permissions matrix that allows fine-grained access control per feature module.
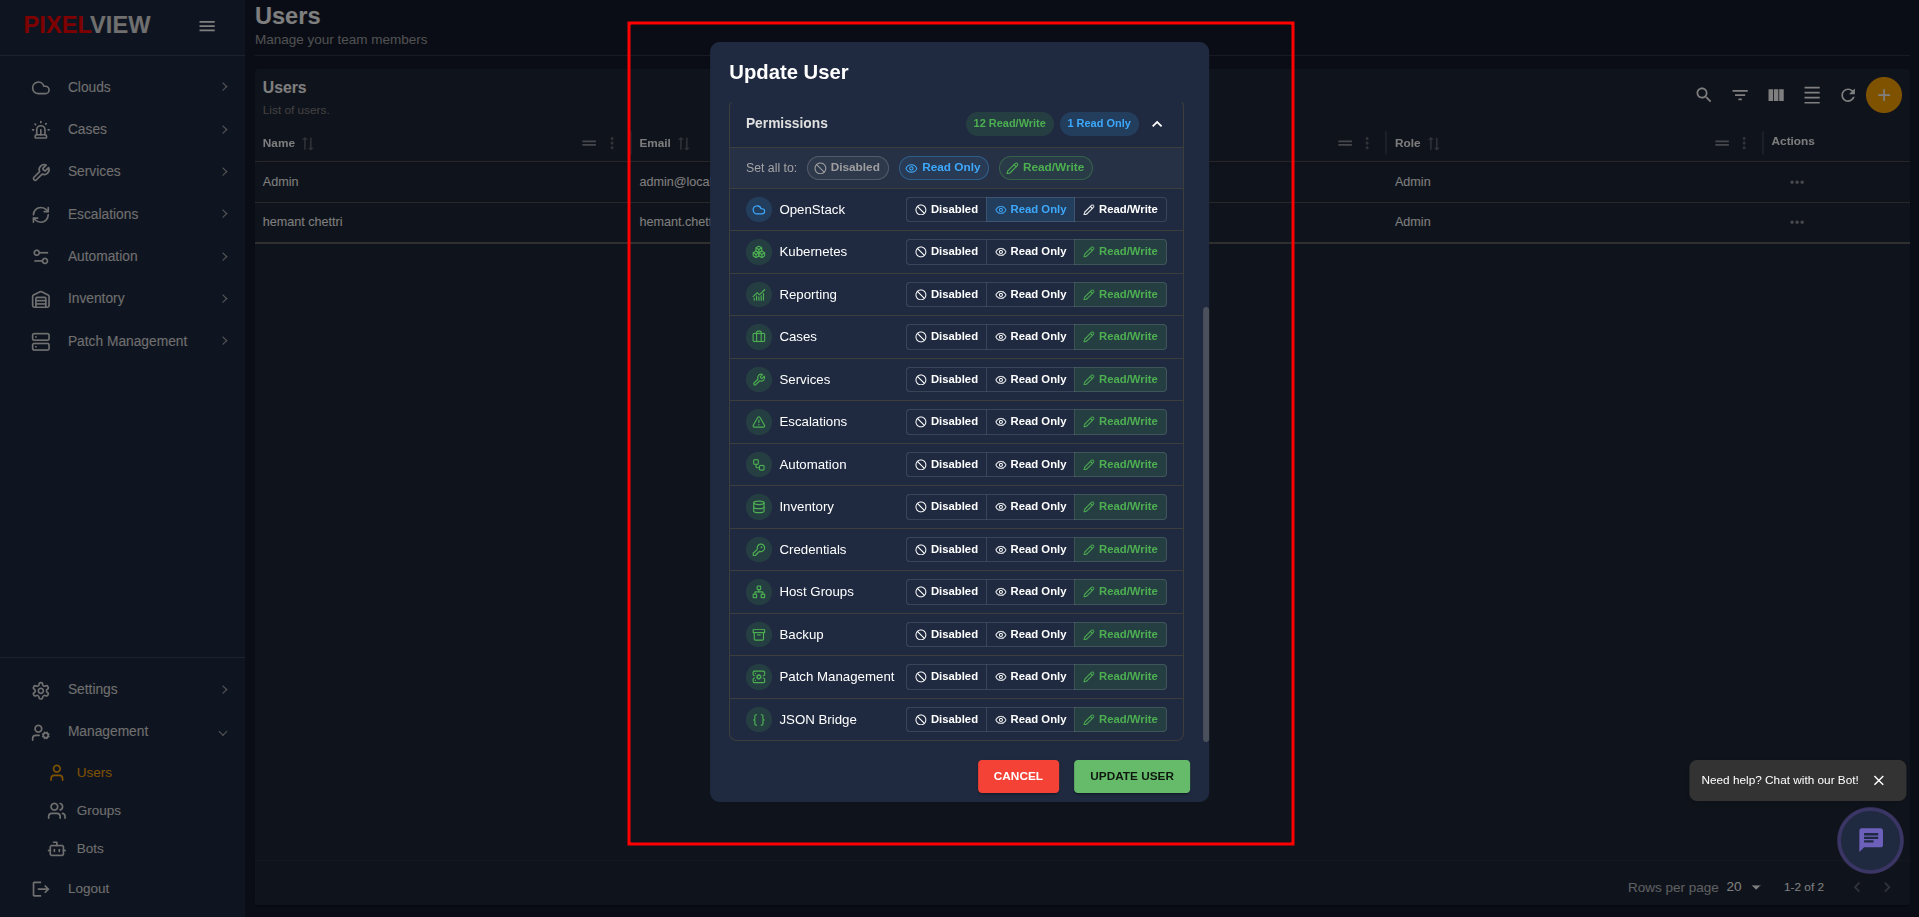
Permissions can be configured when Inviting a User or when Updating a User.
Quick Bulk Actions
- Set all to: Disabled: Revokes access to all modules.
- Set all to: Read Only: Grants view-only access across all modules (default initial state).
- Set all to: Read/Write: Grants full operational and editing capabilities across all modules.
Supported Modules & Capabilities
Each module can be independently set to Disabled, Read Only, or Read/Write:
| Module | Scope / Capabilities |
|---|---|
| OpenStack | Compute instances, flavors, keypairs, volumes, networks, routers, and quotas. |
| Kubernetes | Clusters, nodes, pods, workloads (Deployments, StatefulSets, DaemonSets, Jobs), and ConfigMaps. |
| Reporting | Analytics, metrics utilization, and executive infrastructure reports. |
| Cases | Incident tickets, alert triage, comments, observables, and task management. |
| Services | Monitoring data sources and service configurations (Prometheus, Zabbix). |
| Escalations | Escalation policy workflows, timing levels, and alert routing paths. |
| Automation | Playbooks, workflows, rules, runners, scripts, and execution history. |
| Inventory | Catalogue discovery, clouds, regions, zones, servers, and network devices. |
| Credentials | Infrastructure API keys, SSH keys, and service secrets. |
| Host Groups | Server clustering, tags, and host categorization. |
| Backup | Computers, backup destinations, schedules, and restore logs. |
| Patch Management | OS patchsets, update planners, and rollout executions. |
| JSON Bridge | Custom JSON schema webhooks and external alert ingestion bridges. |
Access Groups
The Groups view (/groups) allows administrators to organize team members into functional operational units (e.g., admins, Approvers, L1 Reviewers, L2 Reviewers) for collaborative incident management, alert assignments, and escalation routing.
Overview & Groups Table
Navigate to Management > Groups from the left navigation sidebar:
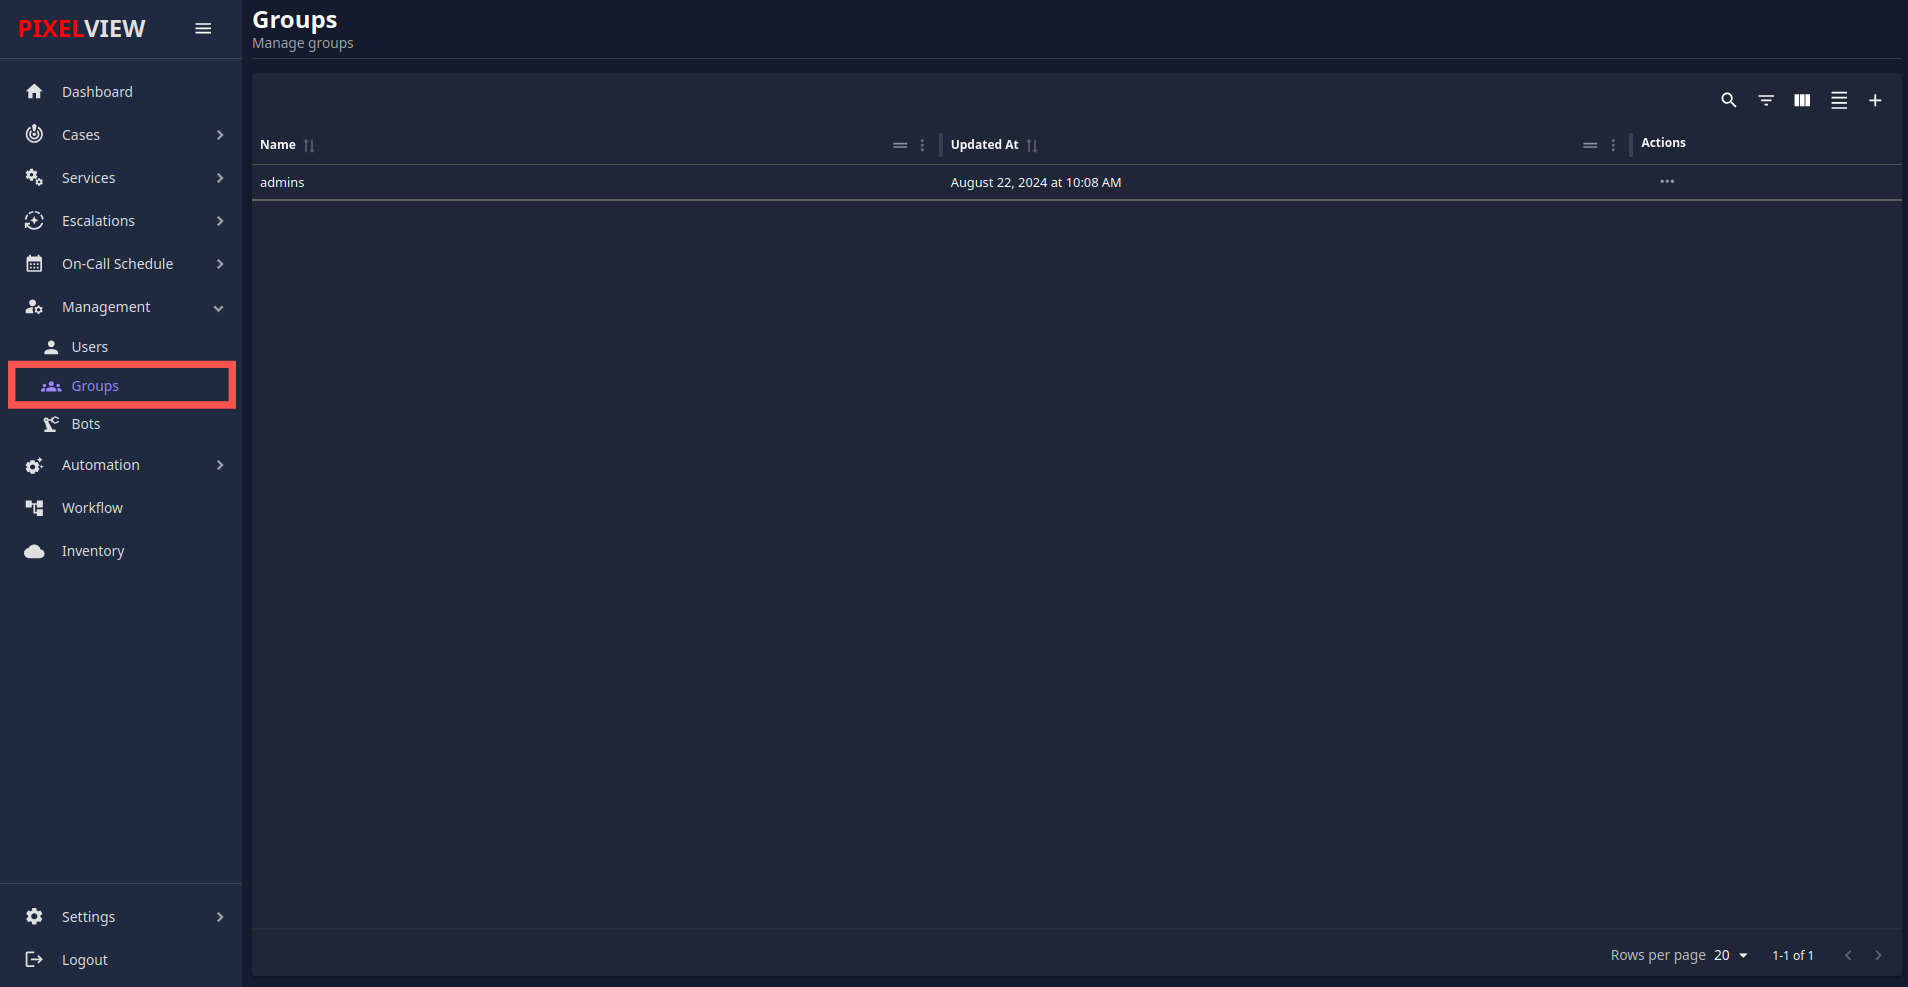
The groups table displays all configured user groups:
| Column | Description |
|---|---|
| Name | Unique name identifier of the group. |
| Updated At | Timestamp indicating when the group or its member list was last modified. |
| Actions | Context menu (...) providing options to View or Delete the group. |
Table Toolbar Controls:
- Search / Global Filter: Search across group names.
- Toggle Column Filters: Filter specific table columns.
- Show/Hide Columns: Customize visible table headers.
- Density Toggle: Adjust between compact and relaxed row height.
- Refresh: Fetch the latest group records from the server.
- Add Group (
+): Open the group creation dialog.
Creating a New Group
To create a new access group:
- Click the
+(Add Group) button located in the top-right corner of the table toolbar: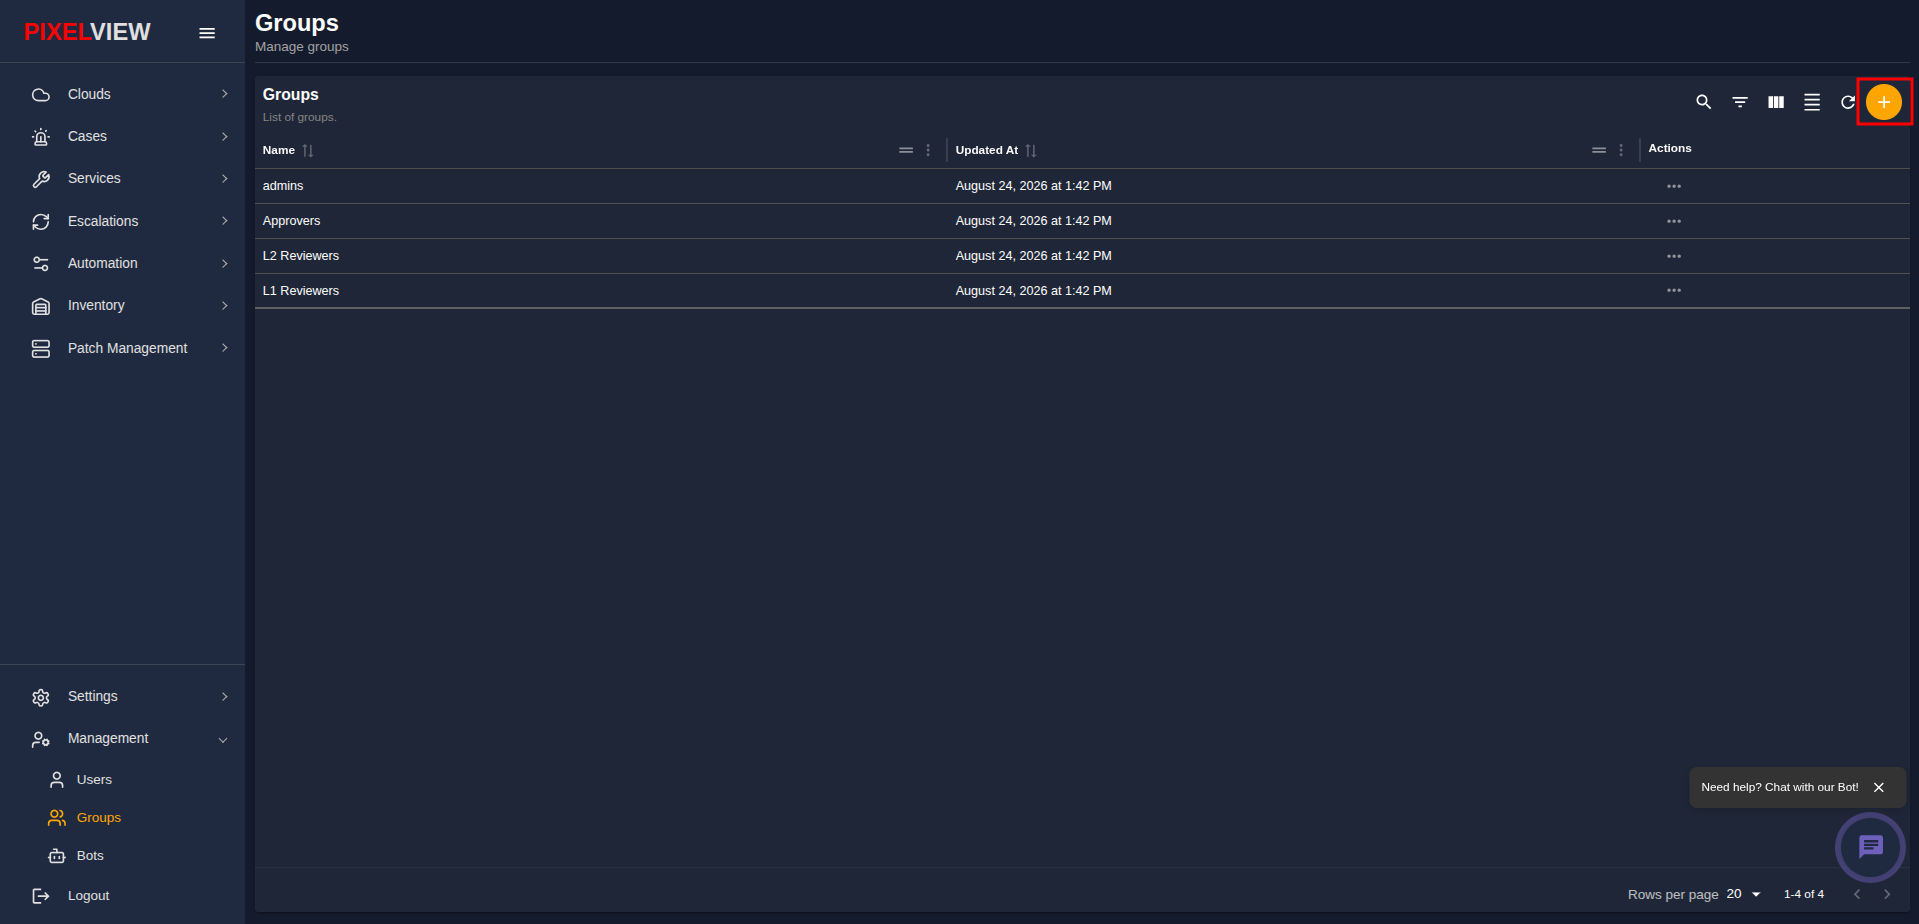
- In the Add Group modal dialog:
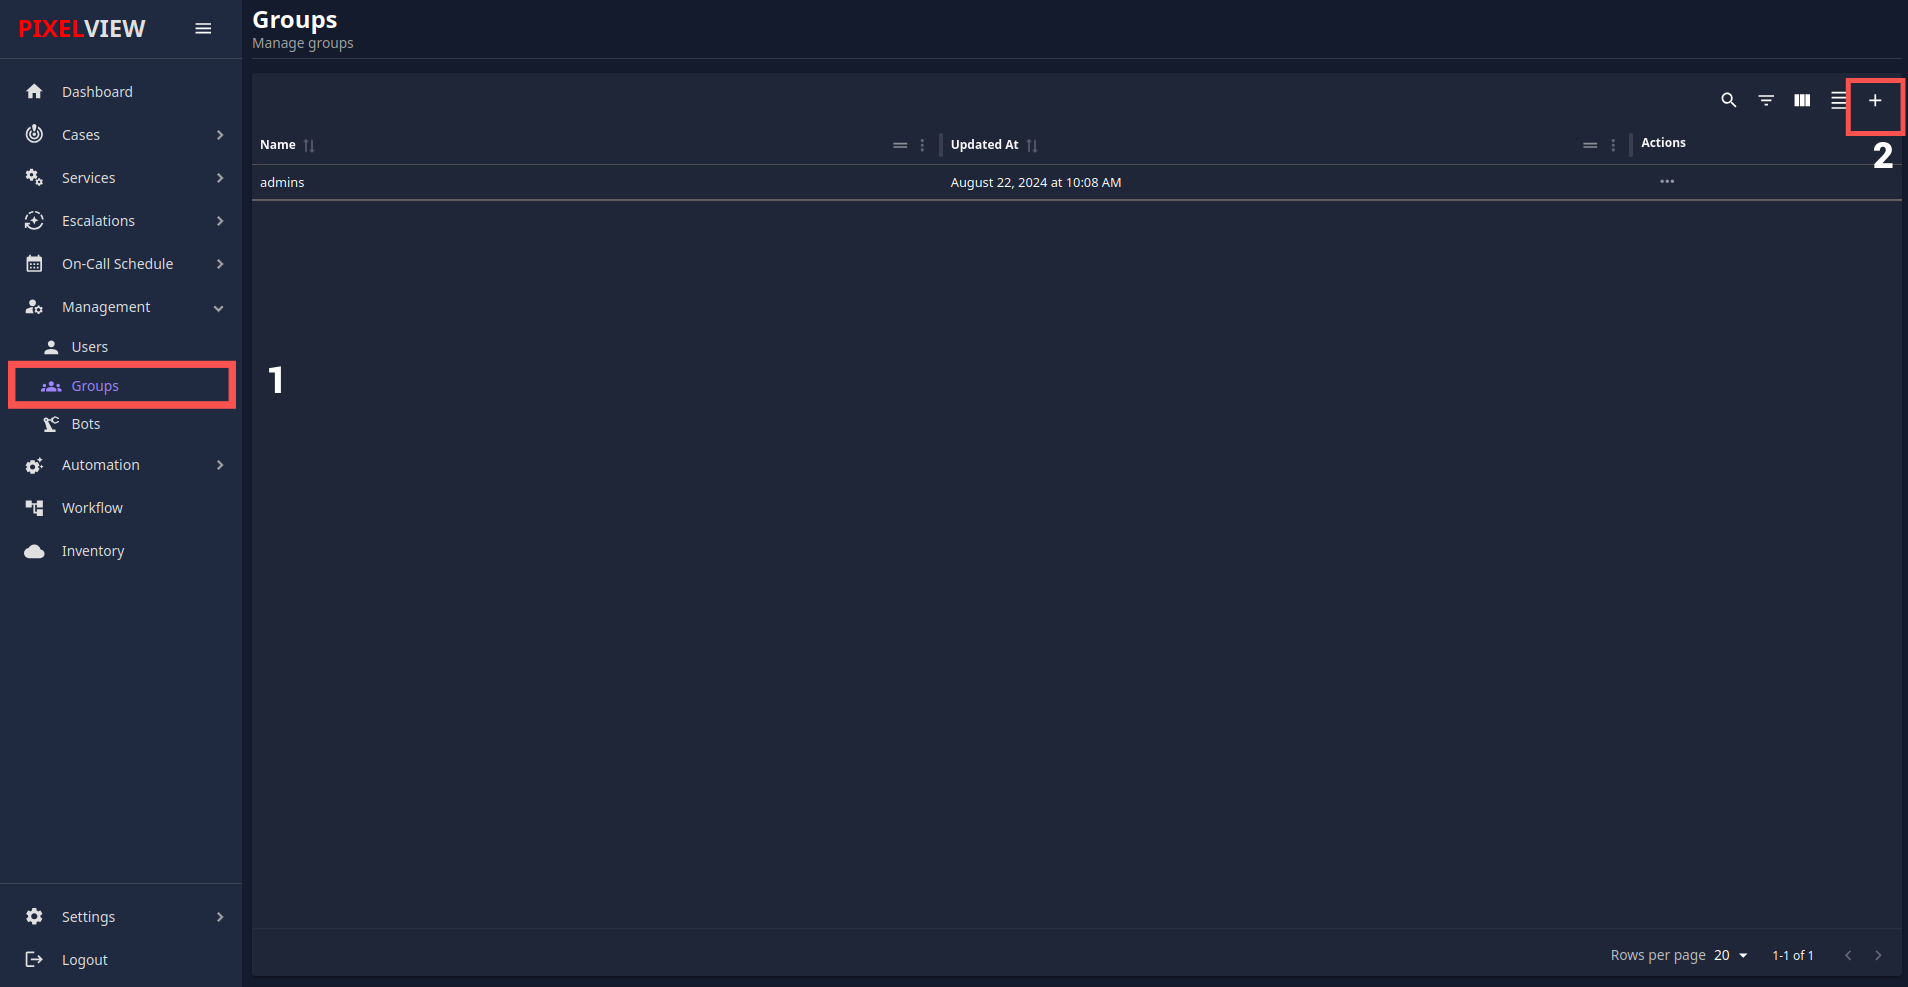
- Group Name (Required): Enter a unique and descriptive name for the group (e.g.,
admins,Approvers). - Add Members: Select one or multiple registered team members to add to the group.
- Click Create to save the new group.
Managing Group Membership & Actions
In the Groups table, click the ... icon under the Actions column for any group:
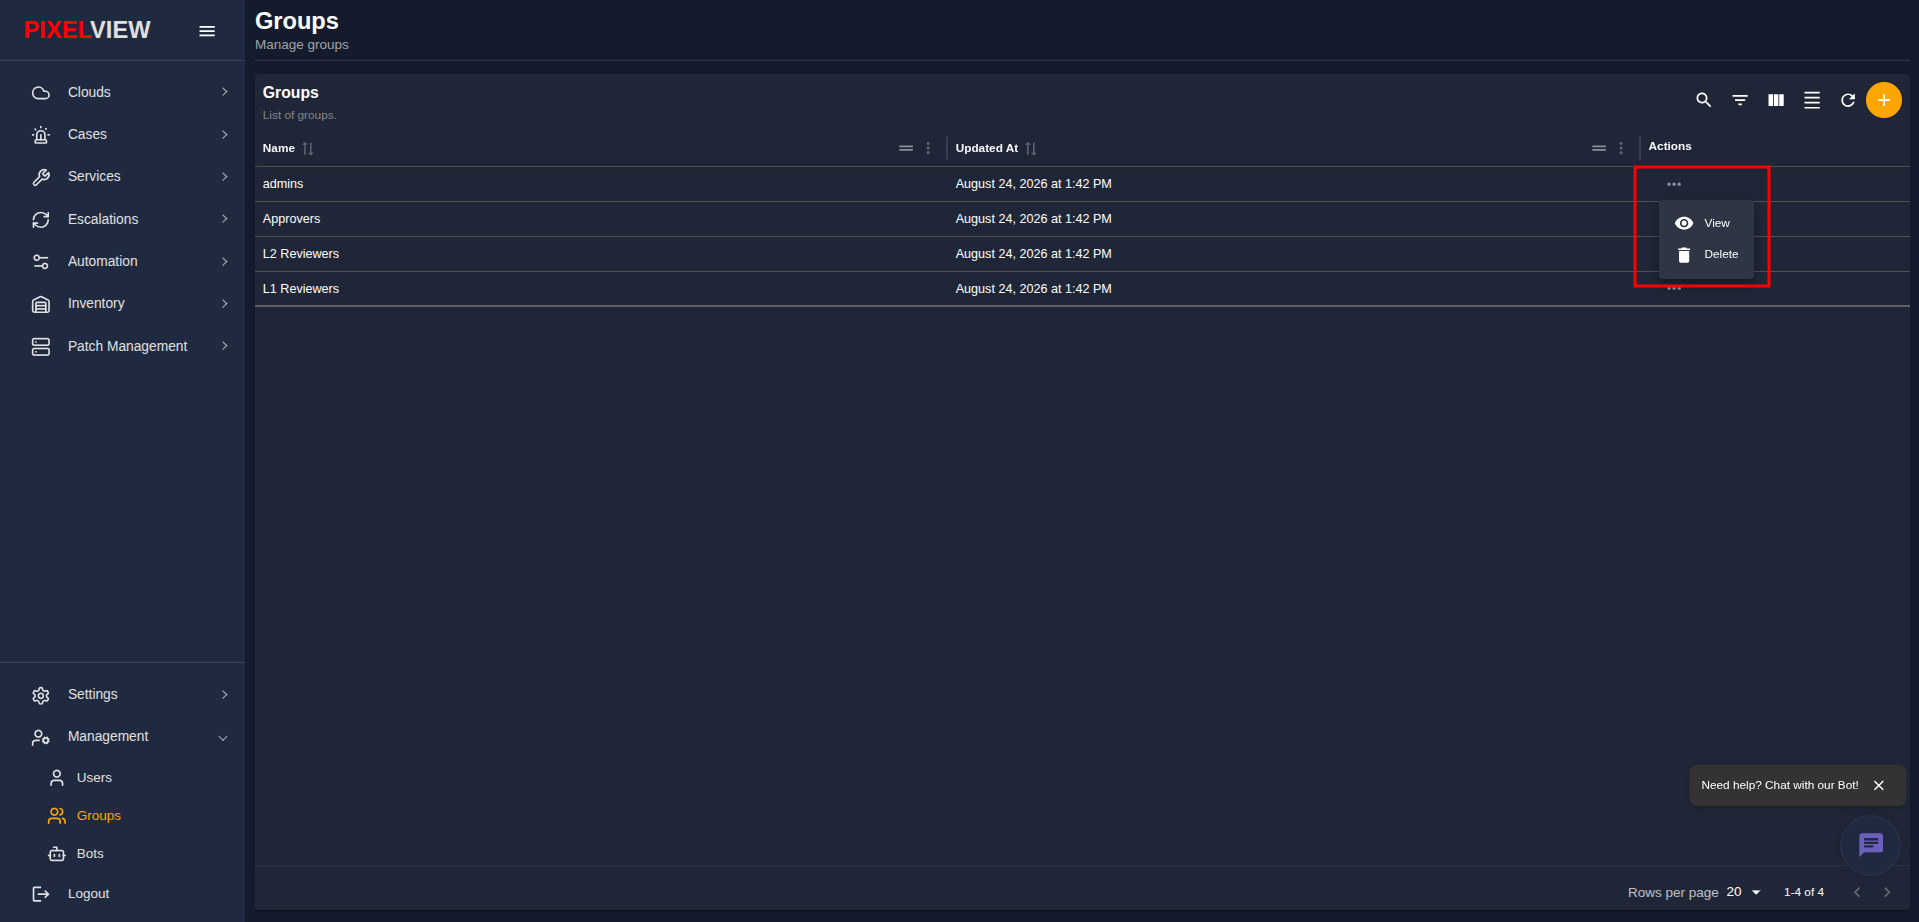
View & Edit Membership (Eye Icon)
Clicking View opens the group management modal with two tabs:
- Members Tab:
- Displays the list of current members assigned to the group, including user avatar and full name.
- Click Remove next to any member to detach them from the group.
-
If no members are assigned, shows
No members in this group. -
Other Users Tab:
- Displays all registered platform users who are not currently part of the group.
- Click Add next to any user to immediately add them to the group.
- If all users are already assigned, shows
No users yet.
Delete Group (Trash Icon)
Clicking Delete prompts a confirmation dialog:
Confirming will permanently remove the group from the system. Individual user accounts are preserved.