Migration Manager Overview
Migration Manager (/migration-manager) is a web-based console in PixelView designed for cloud operators and administrators to schedule, manage, and monitor infrastructure migrations across OpenStack environments.
Instead of running complex command-line scripts or manually executing API calls, Migration Manager provides a unified, visual interface to evacuate compute hypervisors and storage devices with real-time tracking, live execution logs, and automated safeguards.
What You Can Do in Migration Manager
- Evacuate Compute Hypervisors: Move all virtual machine instances off a physical server to another host for scheduled kernel updates, hardware repairs, or maintenance.
- Evacuate Storage Devices: Relocate persistent block storage volumes across storage backend pools without downtime.
- Perform Zero-Downtime Live Migrations: Relocate active instances while they remain running, keeping customer services online.
- Control Scheduling & Delays: Delay specific instances or volumes to accommodate customer maintenance windows, or resume them on demand.
- Monitor Live Progress & Logs: Watch migration progress in real time, view step-by-step checklists, and inspect streaming execution logs directly in the browser.
- Safely Cancel Operations: Abort unstarted instances or halt an entire migration group with one click.
Navigating to Migration Manager
To open Migration Manager:
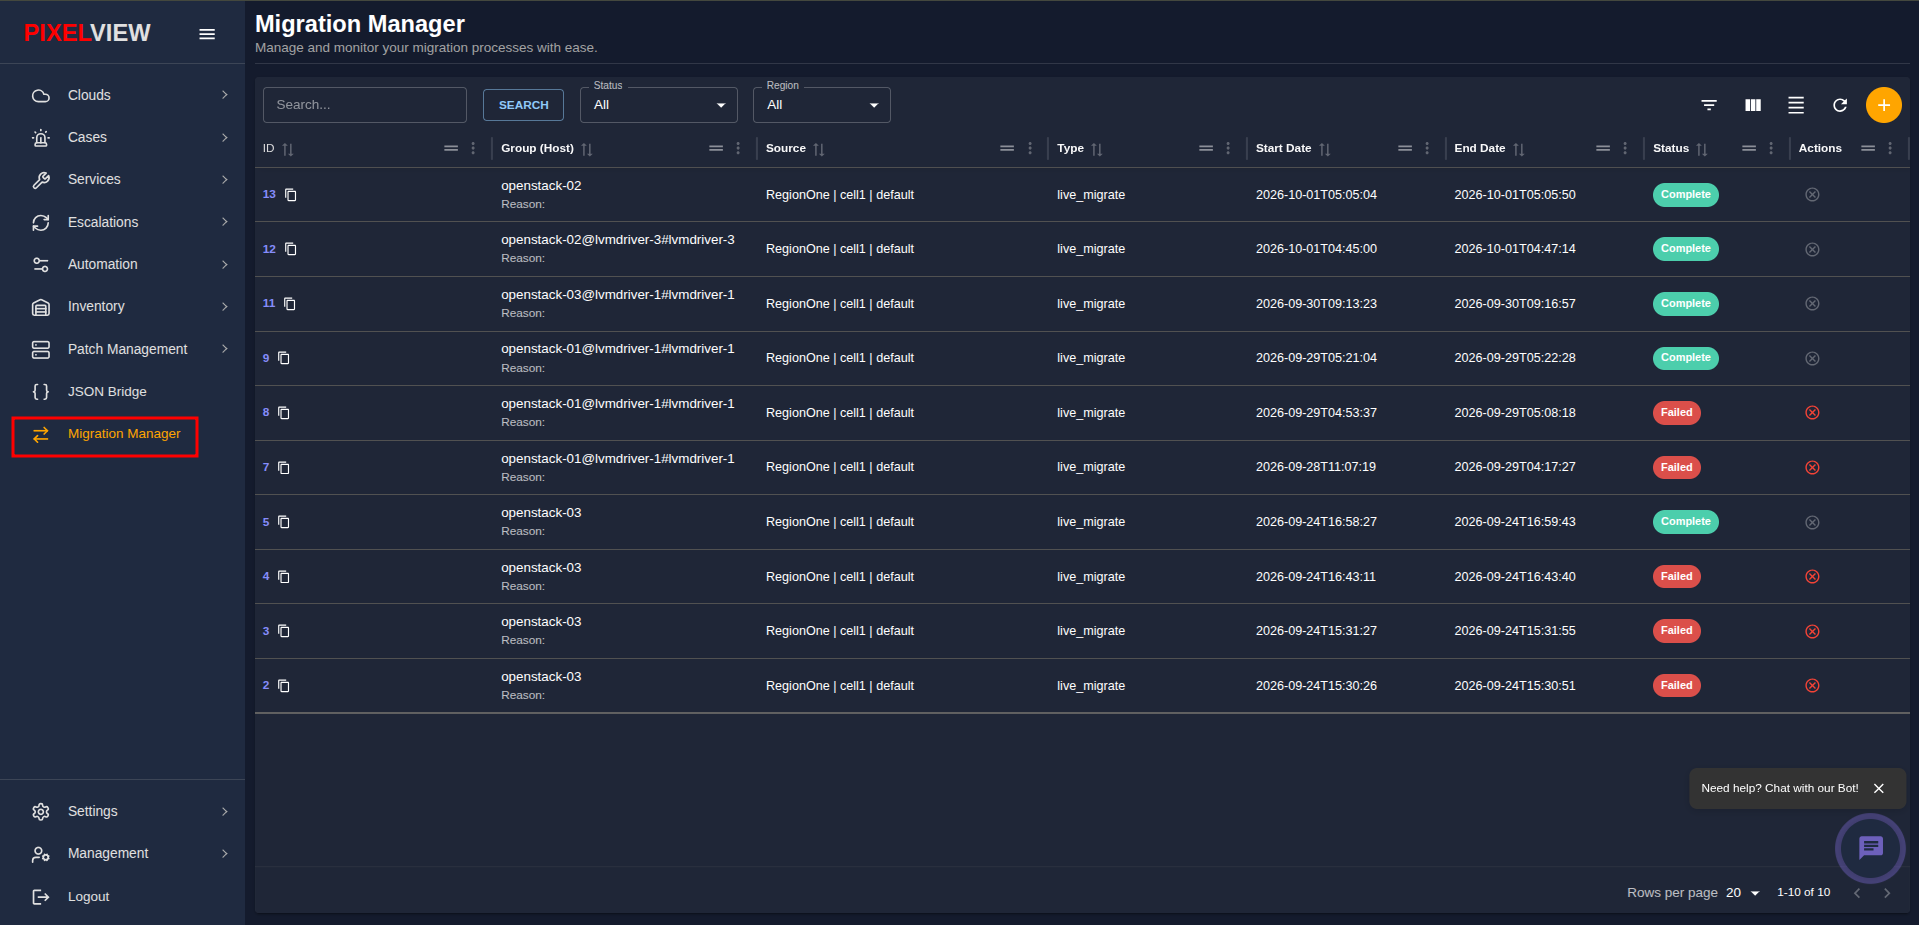
- In the left navigation sidebar, click Migration Manager (indicated by the bidirectional arrows icon):
Understanding the Dashboard
The main Migration Manager dashboard provides an operational overview of all current and historical migrations:
Dashboard Toolbar
- Search: Search across group names, target hosts, source locations, and IDs.
- Status Filter: Filter the table to display only
All,New,Running,Complete, orFailedmigrations. - Region Filter: Scope displayed migrations to a specific cloud region.
- Refresh: Reload the table with the latest live status.
+(Create Migration): Open the wizard to schedule a new migration.
Migrations Table
Every migration is organized as a Migration Group, representing an evacuation of a specific host or storage device:
| Column | What It Means |
|---|---|
| ID | Unique identification number for the migration group. Click the copy icon to copy the ID to your clipboard. |
| Group (Host) | The target compute host (e.g., openstack-02) or storage device (e.g., openstack-01@lvmdriver-2#lvmdriver-2) being evacuated, along with any optional notes or change ticket reasons. |
| Source | The cloud topology path of the source resource: Region | Cell | AvailabilityZone | Host. |
| Type | The migration method applied to this group (e.g., live_migrate, standard_migrate). |
| Start Date | When the migration was created or scheduled to begin. |
| End Date | When all workloads in the group finished migrating. Displays N/A while the group is active. |
| Status | High-level status badge showing the current progress of the group. |
| Actions | Quick controls, such as cancelling the migration. |
Migration Statuses Explained
New(Teal): The migration has been created and validated, and is queued to begin.Running(Blue): The system is actively validating, queueing, and migrating workloads.Complete(Green): All virtual machines or storage volumes in the group have been successfully migrated and verified on their destination.Failed(Red): One or more workloads encountered an error during migration. Open the group to inspect notes and logs.Cancelled(Dark): An operator stopped the migration. Unstarted workloads were aborted.
Starting a New Migration
To start a migration:
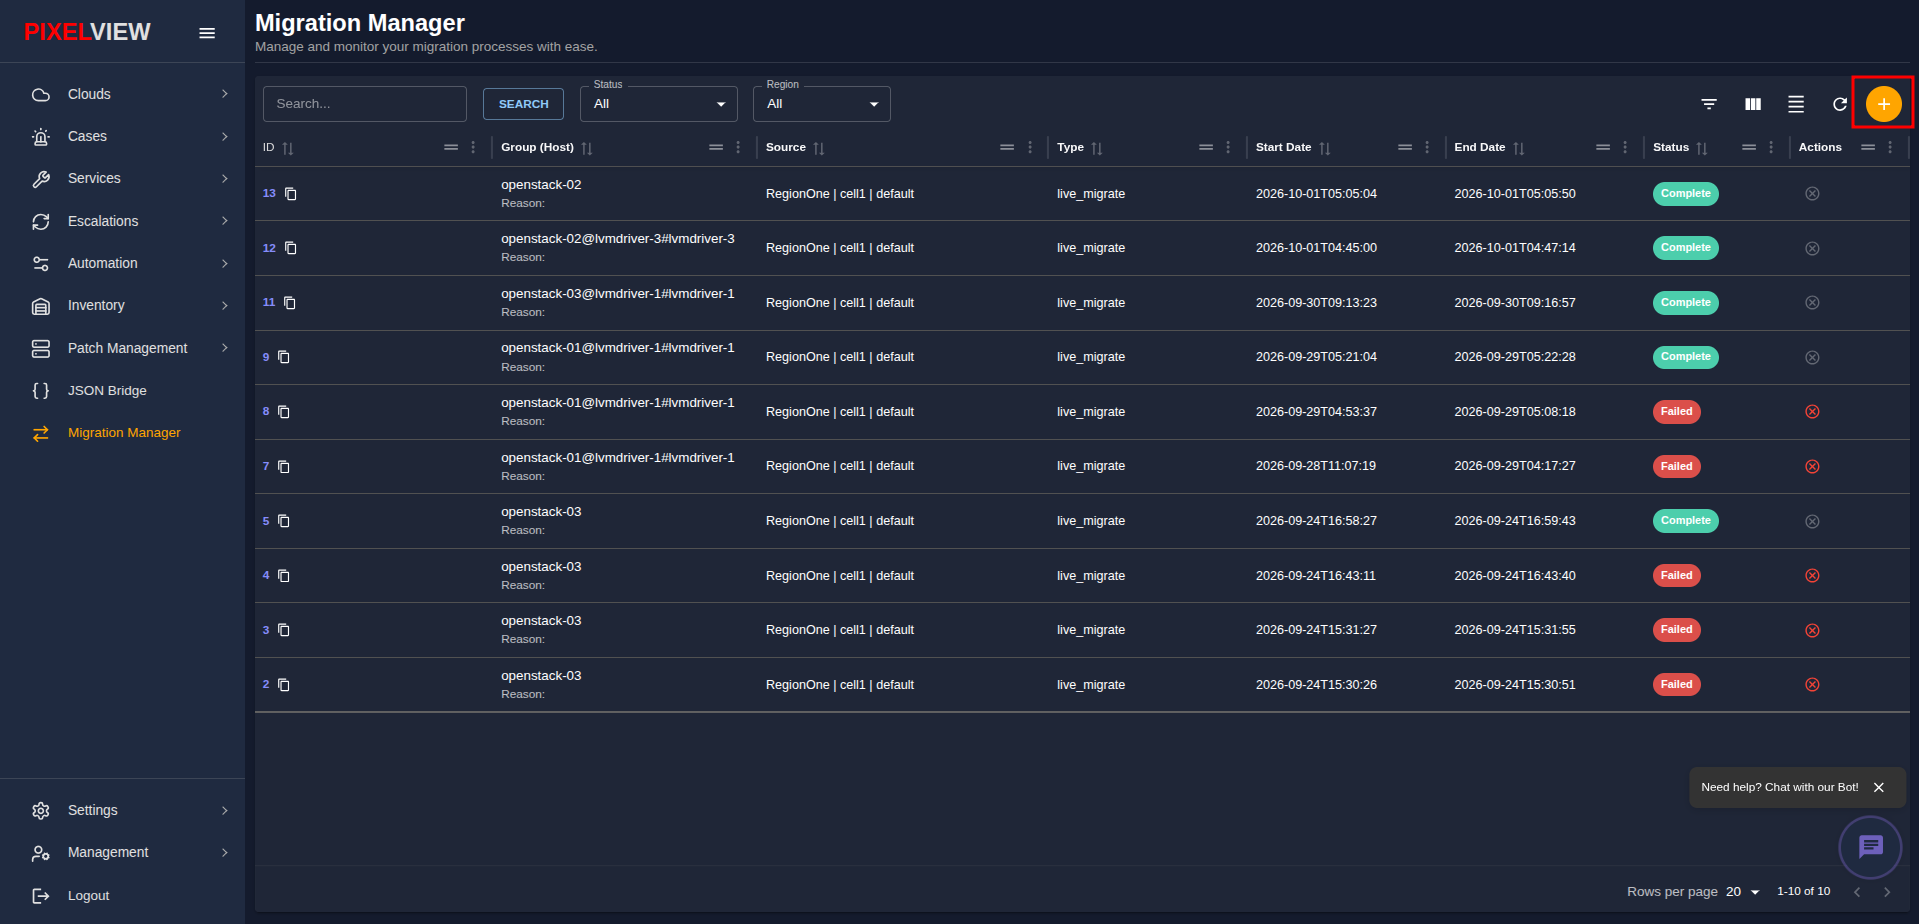
- Click the orange
+(Create Migration) button in the top-right toolbar:
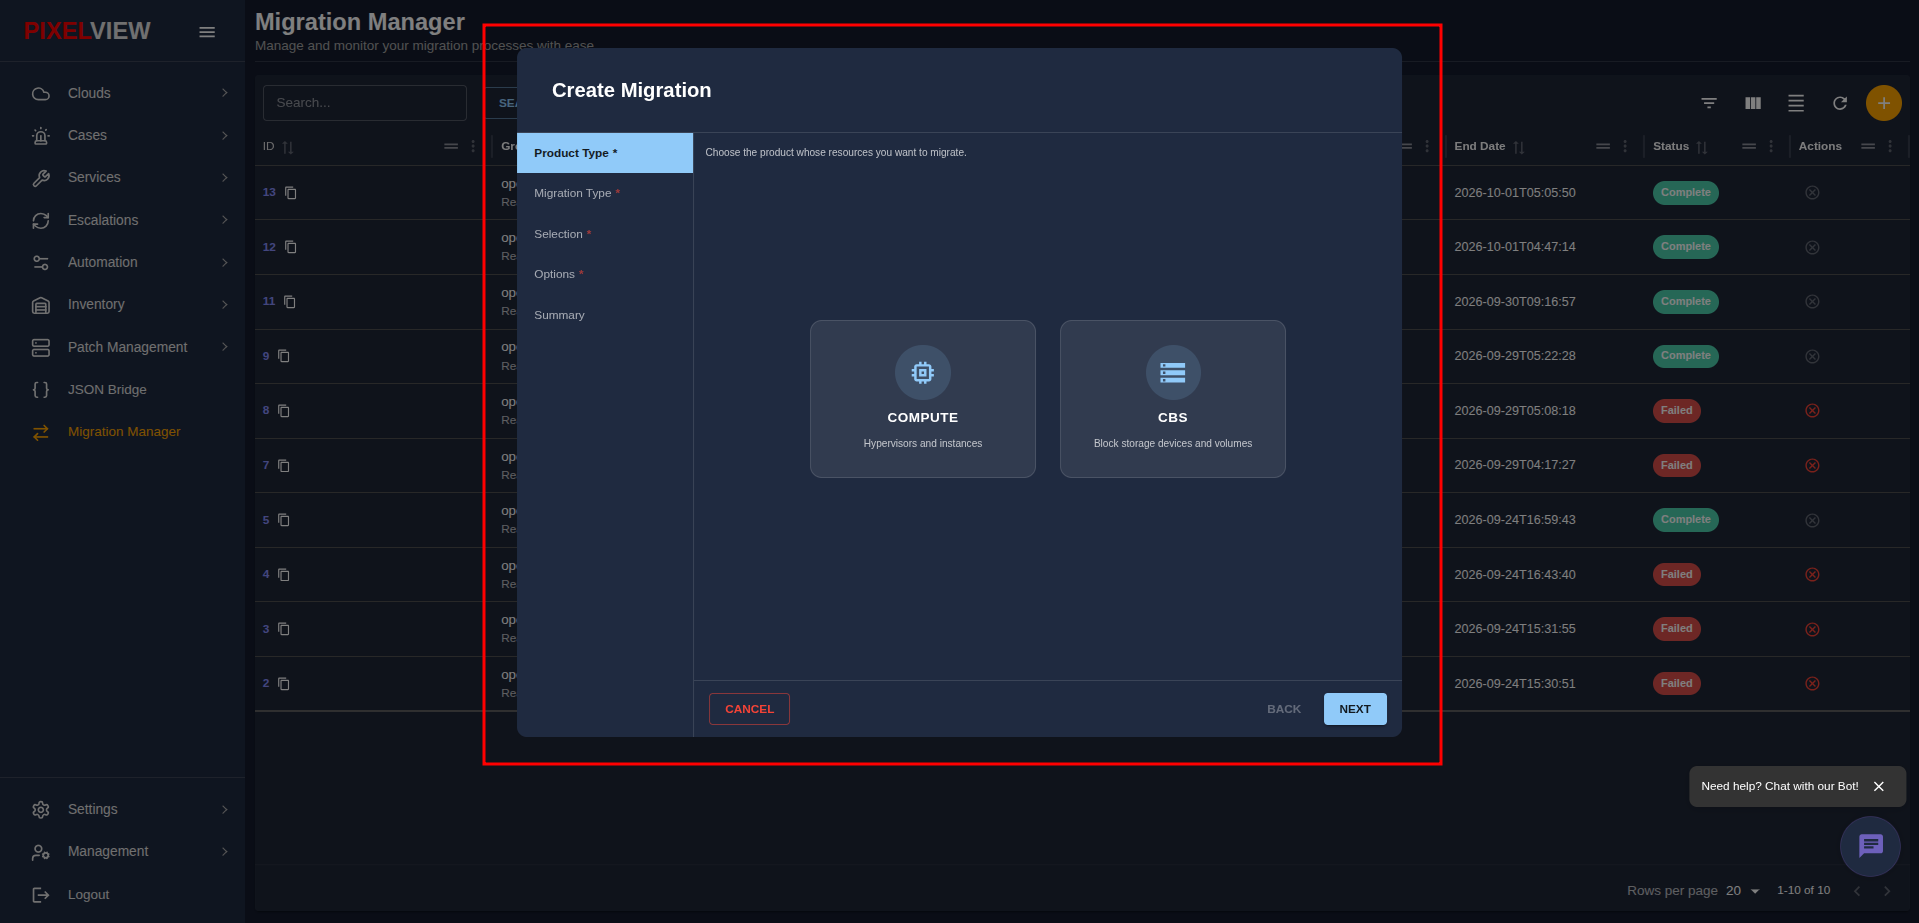
- The Create Migration dialog will open, presenting the Product Type selection:
Choose Your Migration Product
- COMPUTE: Choose this to evacuate virtual machines from a compute hypervisor.
- See the Compute Migrations Guide for full instructions.
- CBS (Cloud Block Storage): Choose this to evacuate persistent block volumes from a storage pool or device.
- See the Block Storage Guide for full instructions.
Guides in This Section
- Compute Migrations — How to evacuate a compute host, choose migration classes, track instances, view live logs, and manage delays.
- Block Storage (CBS) — How to evacuate storage devices, retype volumes, monitor replication, inspect storage logs, and manage schedules.
- Cinder (CBS) Setup & Troubleshooting — Storage backend provisioning, hypervisor Libvirt tuning for live disk swaps, stuck volume remediation, and multi-region setup.